DIY Acoustic Panels That Actually Look Good: A Weekend Upgrade for Echoey Homes
Hard floors and bare walls can make a home feel loud and tiring. Learn how to plan, build, and place stylish DIY acoustic panels that reduce echo—without turning your room into a studio.
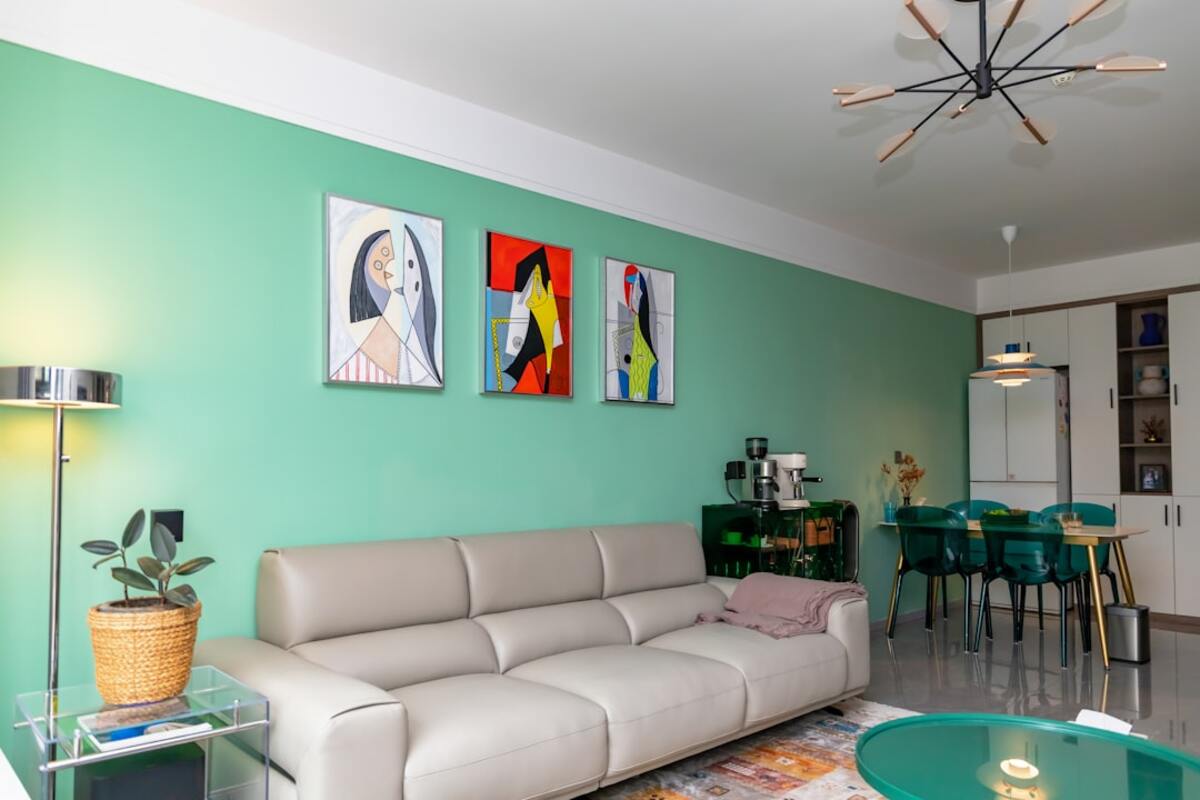
- Echo is usually a “too many hard surfaces” problem—acoustic panels fix it faster than rearranging everything.
- Placement matters more than thickness: target first-reflection points and large bare wall zones.
- You can build panels with safe, breathable materials and fabric that matches your decor—on a realistic budget.
Why your room sounds “loud” (even when it isn’t)
If a room feels harsh, tiring, or “shouty,” it’s often not the volume—it’s the reverberation. Sound bounces off hard surfaces (glass, drywall, tile, wood floors) and keeps reflecting. That lingering tail makes speech less clear, TV dialog harder to understand, and everyday noises (dishes, footsteps, kids playing) feel sharper than they should.
Most modern homes unintentionally amplify this effect: open-plan layouts, minimal window treatments, sleek furniture, and fewer bookshelves all reduce the soft, irregular surfaces that naturally break up reflections. Rugs and curtains help, but if the space still feels echoey, acoustic panels are one of the simplest “set it and forget it” improvements.
Acoustic panels don’t “soundproof” a room (they won’t stop neighbor noise or block bass from traveling through walls). Instead, they absorb reflections inside the room so what you hear is cleaner and calmer. That’s why they’re trending: they solve a common comfort issue while also doubling as wall art.

Plan first: where panels work best (and how many you really need)
The biggest mistake with acoustic panels is treating them like decor-only items and placing them randomly. You’ll get a far bigger improvement by targeting the spots where reflections matter most—especially for speech and TV listening.
Start with a quick “clap test.” Stand in the center of the room, clap once, and listen. If you hear a fluttery “zing” or a lingering ring, you’ve confirmed reflection buildup. Now do the same test in different zones (near windows, bare side walls, hallways). Those are your likely hotspots.
Prioritize these locations:
- First-reflection points on the side walls near your main listening/TV area (where sound from speakers reflects toward your ears).
- Large bare wall sections opposite windows or across from other hard surfaces (echo likes parallel planes).
- Behind the TV or speakers (helps with dialog clarity and reduces “slapback”).
- Behind a desk if you take video calls (improves voice clarity instantly).
A practical rule of thumb: in a typical living room or open-plan family space, 3–6 medium panels (for example, 24"×48") placed intentionally often makes a noticeable difference. You don’t need to cover every wall; you need to break up reflections where they concentrate.
Choose a look direction before you build: panels can be made to disappear (fabric matching wall color) or become a feature (bold textile, geometric arrangement, or a triptych). Decide early so your fabric choice and panel layout feel intentional, not like an afterthought.
| Room problem | What it sounds like | Best first placement | Fast supporting fix |
|---|---|---|---|
| TV dialog is hard to understand | Words blur, volume keeps creeping up | Side-wall first-reflection points near seating | Area rug + heavier curtains |
| Echo in an open-plan space | Claps “ring,” room feels empty/loud | Large bare wall opposite windows or kitchen surfaces | Textiles (rugs, upholstered pieces) |
| Video calls sound “roomy” | Your voice bounces, mic picks up reverb | Wall behind your monitor or behind you (camera-facing wall) | Bookshelf or thick curtain nearby |
Build stylish DIY panels: materials, safety, and step-by-step
DIY panels are popular because they’re relatively simple woodworking (or even no-cut builds) and you can tailor the finish to your decor. The “secret” is using a breathable fabric over an absorptive core in a frame that holds everything flat and tidy.
Core concept: sound waves enter the fabric, energy dissipates inside the fibrous material, and less sound reflects back into the room. If you cover the panel with plastic, vinyl, or a tightly sealed surface, you block airflow and reduce absorption—so fabric choice matters.
Common, effective core materials:
- Mineral wool (rock wool): excellent absorption; wear gloves, long sleeves, and a mask while handling; seal edges neatly.
- Fiberglass acoustic board: very effective; similar handling precautions as mineral wool.
- Recycled denim insulation: easier on skin, good performance, often thicker; usually costs more.
Thickness and comfort: For most home echo control, 2" thickness is a strong baseline. If you can do 4" (or add a small gap off the wall), you’ll improve absorption into lower frequencies, which helps rooms feel less “boomy.”
Fabric matters more than people think. Choose something you can breathe through easily. A quick test: hold the fabric to your mouth and try to breathe through it. If airflow is easy, sound will pass through to the absorptive core. If it feels like breathing through a rain jacket, pick a different textile.
What you’ll need (for one 24"×48" panel):
- 1×3 or 1×4 lumber for a simple frame (or a pre-made frame kit)
- Absorptive core cut to size (2" or 4")
- Breathable fabric (enough to wrap the front and staple on the back)
- Staple gun + staples
- Wood screws (or pocket-hole screws), wood glue (optional)
- Picture wire / French cleat / D-rings for hanging
- Optional: thin backing fabric to keep fibers contained
Step-by-step build (clean, home-friendly approach):
- Measure and plan your final size. Common sizes (24"×48", 16"×48") look balanced on most walls. Confirm that your insulation board or batts can be cut cleanly to that size.
- Build the frame. Cut lumber to length, pre-drill, and screw into a rectangle. Keep it square (measure diagonals) so your panel hangs straight. If you want a more finished look, use mitered corners or add a thin face trim later.
- Fit the core. Place mineral wool/denim inside the frame. It should be snug but not crushed. Compression reduces performance and can cause bulging.
- Add a containment layer (optional but smart). Wrap the core with a thin, breathable backing cloth (like muslin) before the decorative fabric. This helps keep fibers from shedding during handling and over time.
- Wrap with decorative fabric. Lay fabric face-down, place the filled frame face-down on top, pull fabric tight, and staple along the back edges. Work from centers outward, alternating sides to keep tension even. Fold corners neatly like wrapping a gift.
- Install hanging hardware. For lighter panels, D-rings + picture wire works. For a cleaner, flatter mount, use a French cleat. If you plan a “floating” gap behind the panel (good for performance), cleats or spacers make it easy.
Design tips that make panels look intentional:
- Match a room color, then shift the texture. A panel in the same color as the wall but with a woven fabric reads like a premium finish rather than “equipment.”
- Create a set. Three panels in a row or a 2×2 grid looks like art. Keep spacing consistent (e.g., 2"–4").
- Use a thin wood edge detail. A simple stained frame edge or a black-painted border can make panels look like framed canvases.
- Keep alignments tidy. Align panel tops with door frames, shelving lines, or window headers for a built-in feel.
Budget expectations: DIY panels vary widely based on core and fabric. If you choose standard lumber and midrange fabric, you can often land in a “reasonable per panel” range while getting a custom look that’s hard to find off-the-shelf.
No. Panels mainly reduce echo and reflections inside your room. Soundproofing requires adding mass, sealing air gaps, and decoupling structures (doors, walls, floors).
No. Panels mainly reduce echo and reflections inside your room. Soundproofing requires adding mass, sealing air gaps, and decoupling structures (doors, walls, floors).
When handled carefully and fully enclosed inside a frame with fabric (and ideally a thin containment layer), many homeowners use these materials successfully. During building, wear gloves, long sleeves, eye protection, and a mask; clean up with a HEPA vacuum if possible.
When handled carefully and fully enclosed inside a frame with fabric (and ideally a thin containment layer), many homeowners use these materials successfully. During building, wear gloves, long sleeves, eye protection, and a mask; clean up with a HEPA vacuum if possible.
For speech and TV clarity, aim for panels to cover the height where sound travels between speakers and ears—often roughly seated ear level. In practice, that means the panel center typically lands around 40"–50" from the floor, depending on your furniture and panel size.
For speech and TV clarity, aim for panels to cover the height where sound travels between speakers and ears—often roughly seated ear level. In practice, that means the panel center typically lands around 40"–50" from the floor, depending on your furniture and panel size.
Placement checklist (snackable):
- Pick 1–2 main listening spots (sofa, desk).
- Identify side-wall reflection points (use a mirror: if you can see the speaker from the seat in the mirror, that spot is a reflection point).
- Start with 2 panels at first-reflection points, then add 1–2 to the largest bare wall area.
- If you can, leave a small gap (1"–3") between panel and wall for a noticeable boost.
Small upgrades that stack well with panels: a thicker rug pad under your area rug, lined curtains, and even a fabric-upholstered bench can further soften reflections. Panels do the heavy lifting; textiles make the room feel finished.